
Ok, so it all started with a toilet paper roll.Yep, that's right--all this inspiration from a lil ol' tp roll! I also used 1 pinecone from my daily walk to lay the rooftop. This was such a fun project and I took plenty o' pics along the way in case you might get inspired enough to want to make a cute little birdhouse of your own.

Just gather up a toilet paper roll, some old cardboard, a pinecone, a few favorite textural elements and you are well on your way to a handmade decoration that will have everyone chirping!

First, I adhered the textured mulberry paper to the toilet paper roll with Faber-Castell Design Memory Craft® Gel Medium and a paint brush. Also add a coat over the top to seal. *Note-this is where you would want to punch or cut an opening for a window or door and a small hole for a perch. I didn't because I'm a total ding bat and apparently love to make things more difficult than they need to be. I digress....

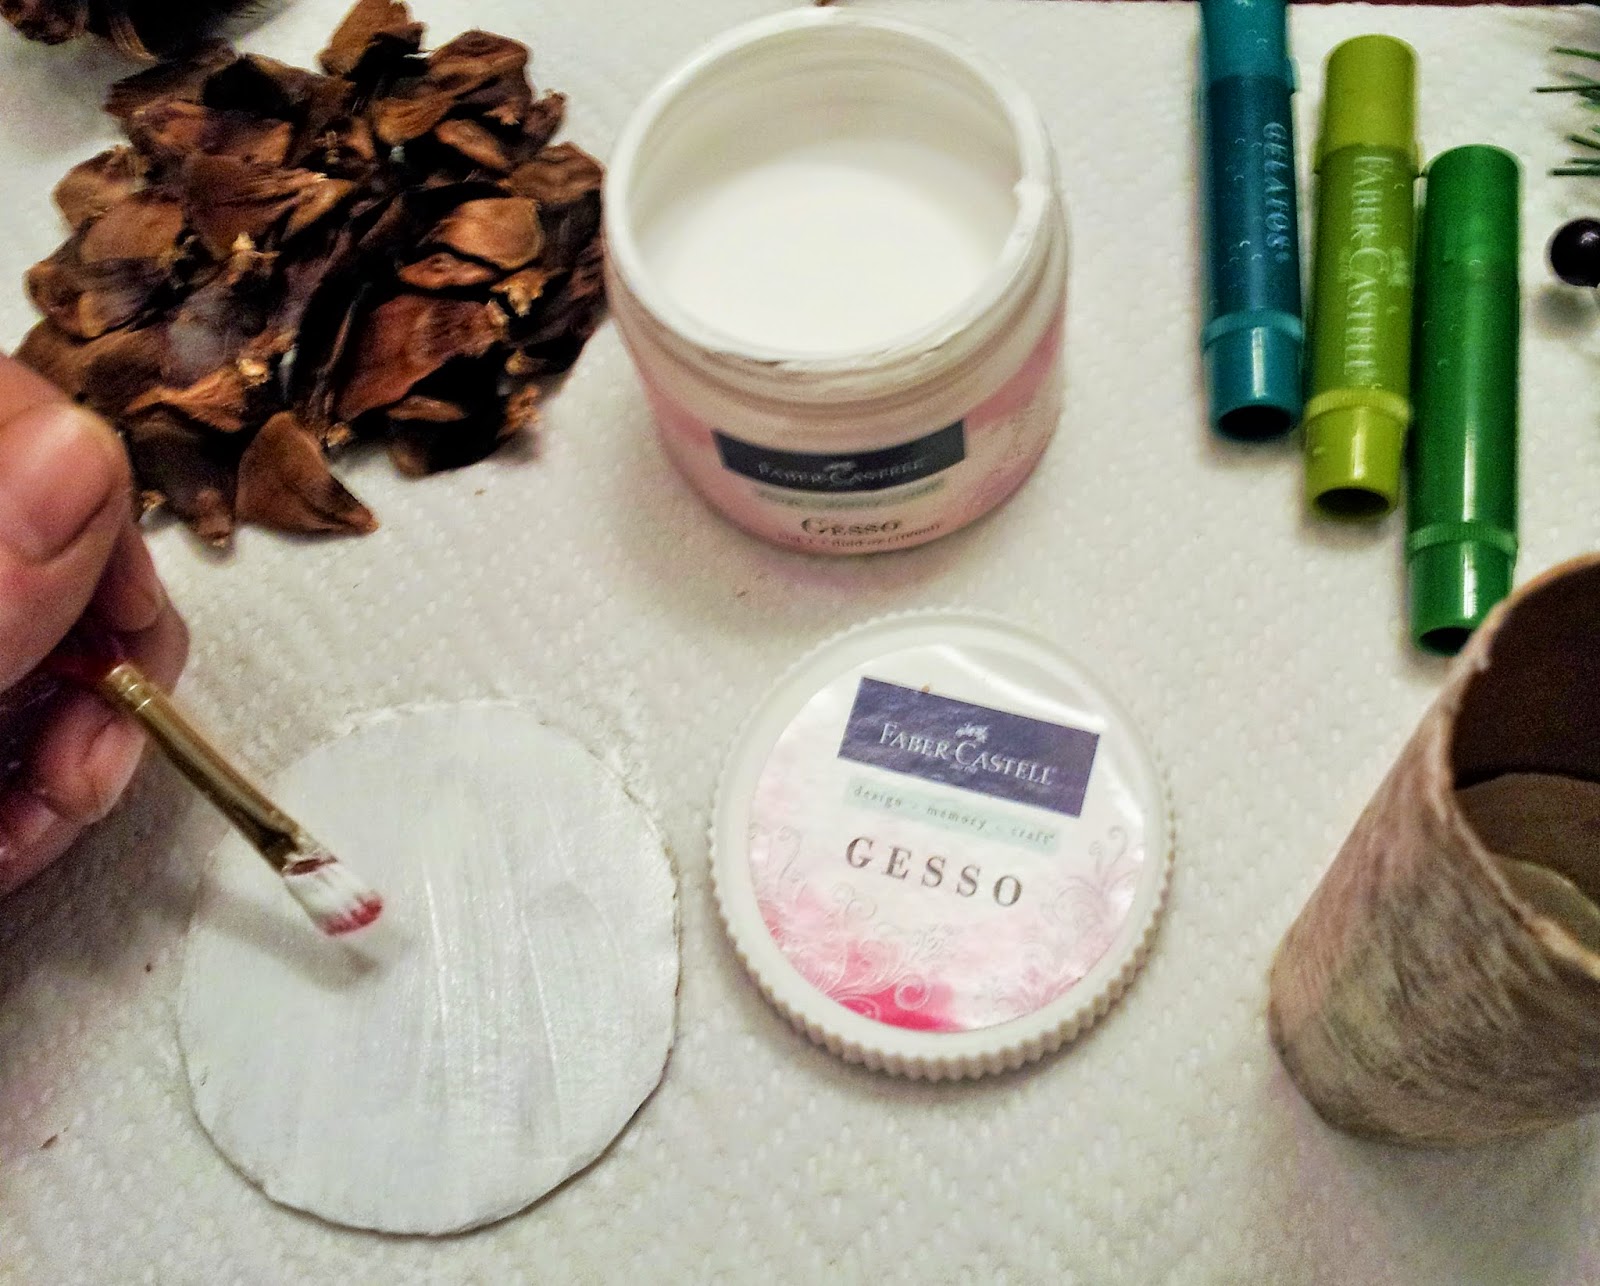
Second, I painted the circle base white with Faber-Castell Design Memory Craft® Gesso.
Third, I sprayed the cardboard roof, base and house structure (tp roll) with IrRESISTable texture spray in Desert Sand. Thanks to the fabulous Kimberly Crawford for sending me this super cool stuff!! I looove it!!

While all that was drying, I added some Faber-Castell Design Memory Craft® Whipped Spackle to the pine tree bristles for a "snowy" effect.

Next, I thatched my pinecone roof! This part was fun! I almost felt as if I were actually building something, lol! I definitely recommend using a hot glue gun for this part and for the actual gluing together of the pieces. With a little care, it will enrich the integrity of this decoration for years of enjoyment.

Now I went back to the base, adding Gelatos® in Pistachio, Green Tea and Spearmint and blending with my finger.

After hot gluing the "house" part to the base, I began building some interest on the ground. I placed some of the pine tree bristles and pinecone scraps, real dried leaves and grass around the base. I noticed that Faber-Castell Design Memory Craft® Glass Bead Glitter Gel worked equally as well, if not better to create the effect of snow because now my snow is more chunky and sparkly too!

Now I'm ready to finish decorating the roof with the snow-covered pine tree needles, winter berries and more "snow", aka- Glass Bead Glitter Gel. See how I cut the top of the tp roll to fit the rooftop? It's nothing more than 2 snips of your scissors to form a point at the top. Super easy.

Now, it is here, at the most inopportune moment, that I realize I haven't put a entrance or exit on my house!!~ ....poor little birdie! So I painstakingly cut out a little "window" and a tiny hole for the "perch". I stuck a little piece of a wood branch into the hole and decorated around the window with dried leaves and a bit more Gesso. Then I added the white snowflake above the window but it still needed something....more red! This is supposed to be a Christmas decoration, after all, right? I decided to add 3 bright red mini roses to the centers of the 4 dark red berry clusters on the roof. This created some unity with the vintage ornament and enamel button reading Holiday Traditions at the base. All in all, I think it turned out pretty cute! Here are a couple close-ups of the finale....


Woah! That was one pic-heavy post!! If you're still with me and haven't gone cross-eyed, YAY!!! And THANKS for coming to visit me. It makes my heart SO happy!!! Wishing you and yours a wonderfully blessed weekend my friend!!!
14 comments:
Very awesome! Makes me want to play with the tp rolls!
Hi Linsey. This is fabulous. Do try to enter at a Vintage Journey again. The link is there, right at the bottom of the post before the comments. Nikki xxx
Thank you for the TT it made your project even more incredible......Lis
wow! anything recycled captures my heart and this is so beautiful! Loved your pine cone roof...what a happy bird!
Oh Linsey I just love this TP inspired birdhouse! You really did a great job! Thanks for sharing your sweet tutorial with us! I may have to make one of these myself!
Hugs,
Jo
xox
Fantastic project Linsey ! Love how you've made the roof ! Thanks for joining us at Frilly and Funkie. Sue C x
Toilet rolls never looked so good! How inventive and gorgeous. Love it Linsey! Thank you for joining us at Frilly and Funkie. Jenny x
How very creative Linsey! I love the pine cone petal roof - and all the foliage attached - so clever to start with a TP roll!! Thanks so much for joining us in the AVJ birds of a Feather Challenge!
Wow Linsey! What a fantastic project! So fun and creative! Thanks for sharing your creative process! Happy Holidays!
What a fantastic festive birdhouse - it's just a delight from top to bottom. Thanks so much for sharing the steps along the way - I love seeing projects come to life like this. Thanks so much for joining us on A Vintage Journey.
Alison x
Totally adorable festive birdhouse. Very creative project. Thanks for joining in the challenge at AVJ and good luck.
Julie x
Such a fabulous birdhouse - amazing use of a toilet roll! And I love the thatching too. Thank you for joining is at A Vintage Journey for our birds of a feather challenge x
Really cool work!!! Love it. Thanks for joining us over at The Mirror Crack'd!!! Hugs, Susanne.
Wow this is amazing. Love the detailed tutorial and I am still giggling at you struggling with your entrance. That's just the sort of thing I do. I recently decorated up words that go on stands and forgot to put them in the stands so that when I tried they no longer fitted!!
Thanks for sharing this absolute stunner with us
Thanks for sharing this beauty with us
Lin
The Mirror Crack'd
Post a Comment